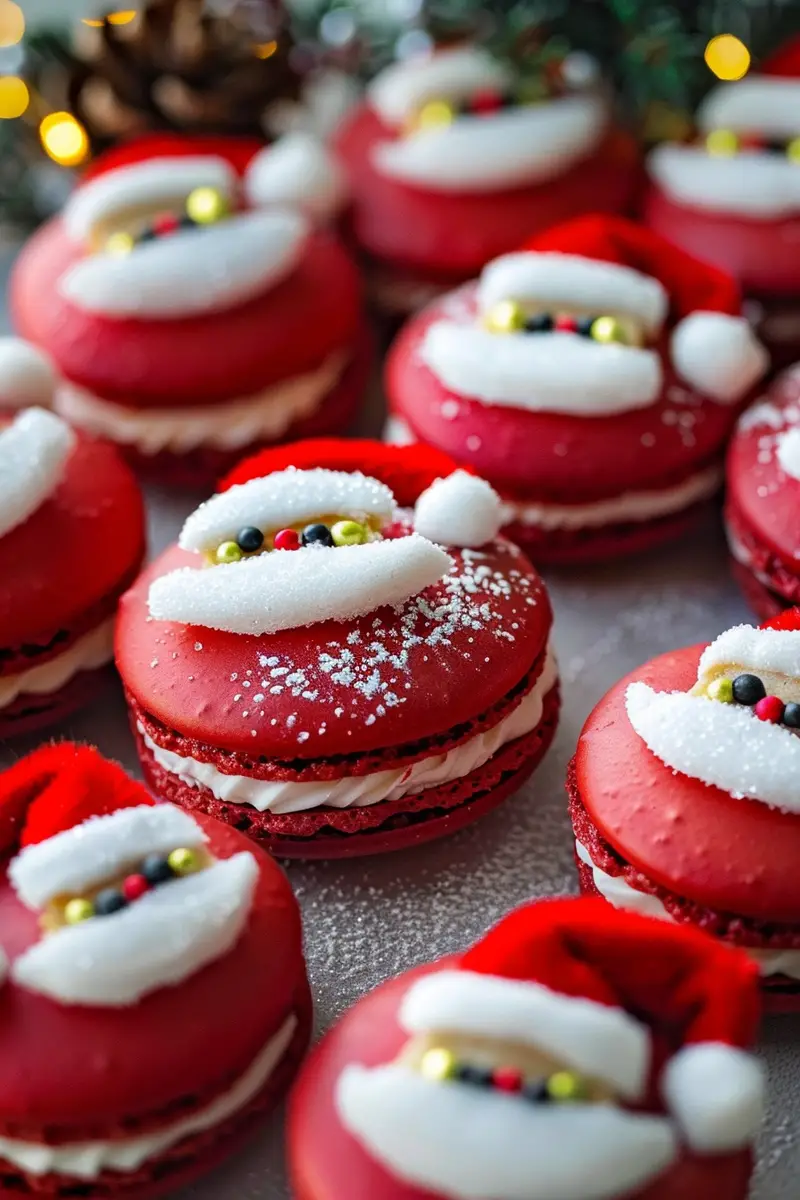
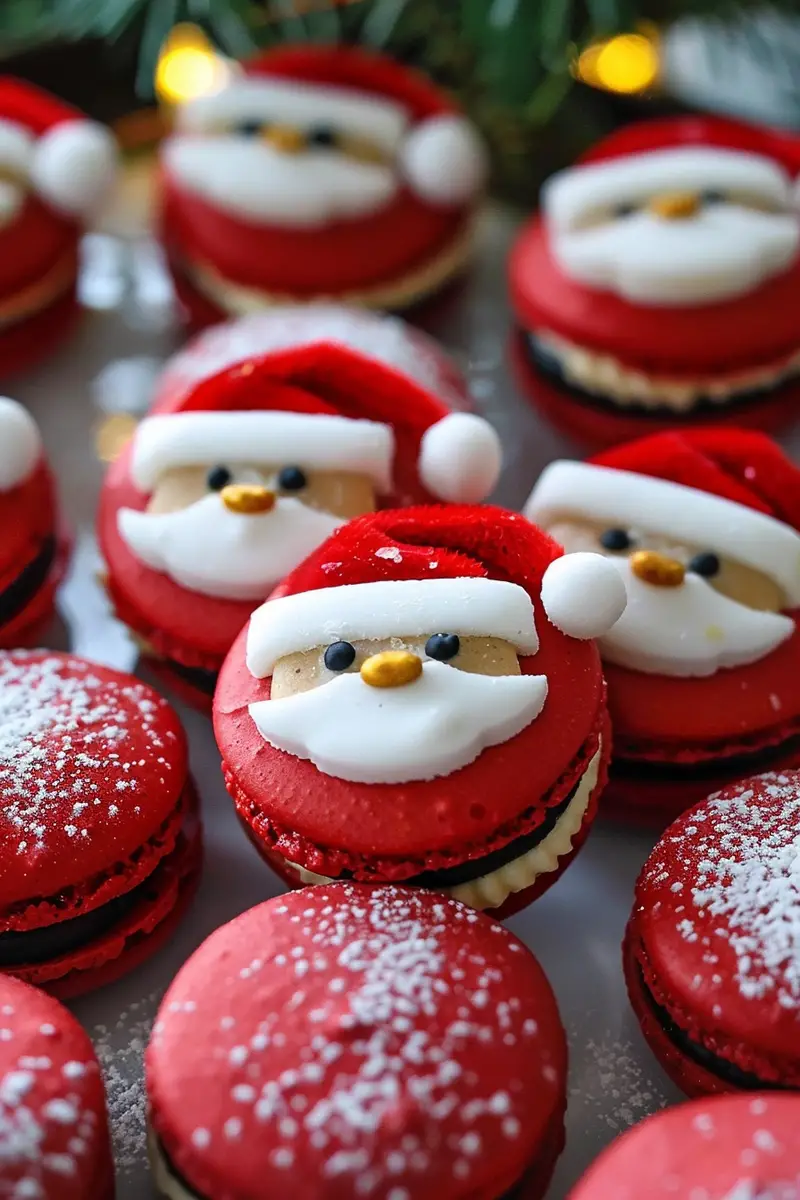
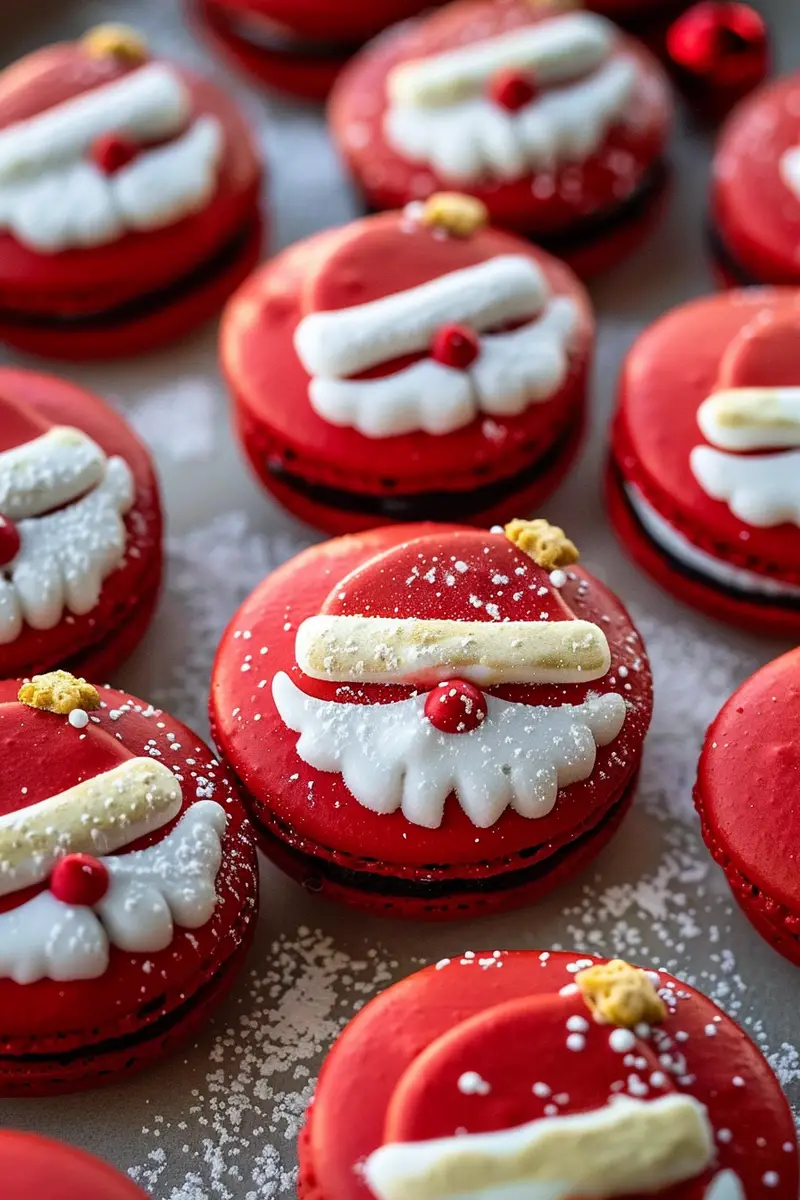
The holiday season brings joy and cheer to our homes, and what better way to celebrate than with deliciously festive treats? This recipe for Santa Claus Macarons captures the spirit of Christmas in every bite. These delightful confections not only taste heavenly but also look adorable with their jolly Santa faces. The combination of sweet almond meringue shells filled with creamy frosting creates a perfect balance of flavors and textures.
In this article, we will guide you through the entire process of making these enchanting Santa Claus Macarons from scratch. Whether you want to impress your family during the holidays or bring a unique gift to a friend’s gathering, these macarons are sure to be a hit. Not only are they visually appealing, but they also provide an opportunity for creativity in the kitchen. You can customize your designs and colors according to your preference.
Get ready to embark on a baking adventure that will fill your home with delightful aromas and joyful memories. Follow along as we break down the ingredients needed and provide step-by-step instructions for preparing these charming treats. By the end of this article, you will be well-equipped to create your own batch of merry Santa Claus Macarons that are perfect for sharing or enjoying yourself!
Main Ingredients
Almond Flour
Almond flour is essential for making macarons because it provides a rich flavor and contributes to the desired texture. For this recipe, you will need 1 cup (100 grams) of finely sifted almond flour. It is important to use finely ground almond flour rather than almond meal for smoother shells. Sifting before measuring ensures there are no lumps, which can affect the final product.
Powdered Sugar
Powdered sugar is another crucial component in this macaron recipe. You’ll need 1 cup (120 grams) of powdered sugar combined with almond flour. The powdered sugar not only sweetens the mixture but also helps create that signature smooth texture that macarons are known for. Be sure to sift it together with the almond flour to avoid any clumps.
Egg Whites
Egg whites are vital in achieving those beautiful macaron shells. For this recipe, use 3 large egg whites at room temperature. Aging the egg whites by letting them sit out overnight can improve their stability when whipped into peaks. This step is crucial for creating the meringue that forms the base of your macarons.
Granulated Sugar
To stabilize the meringue and add sweetness, you’ll need ¼ cup (50 grams) of granulated sugar. Gradually adding granulated sugar while whipping egg whites helps achieve stiff peaks necessary for perfect macaron shells. This step is essential as it ensures that your macarons hold their shape during baking.
Food Coloring
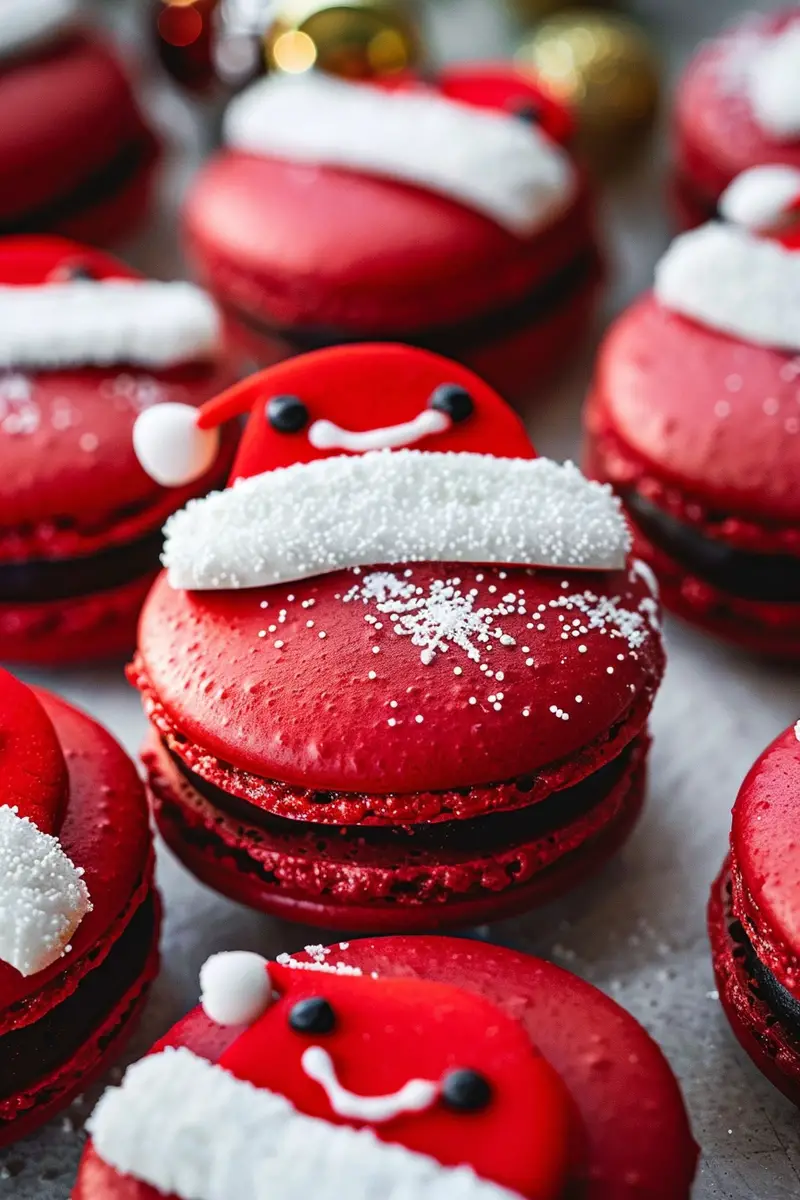
Food coloring adds an extra element of fun and festivity to your Santa Claus Macarons. For this recipe, red coloring gel works best; however, feel free to choose any color you prefer for decorating your Santa faces! Use just enough coloring until you achieve a vibrant hue that represents Christmas cheer.
Frosting Filling
The filling can vary according to personal preference but using buttercream frosting works great! Prepare about 1 cup (230 grams) of vanilla buttercream or cream cheese frosting as it complements the sweetness of the macaron shells perfectly while adding creaminess.
How to Prepare Santa Claus Macarons
Step 1: Preparing Your Baking Sheets
Start by preheating your oven to 300°F (150°C). Line two baking sheets with parchment paper or silicone mats; this prevents sticking and makes cleanup easy later on. If you’re using parchment paper, trace circles onto the paper as guides for uniform macaron sizes—aim for about 1½ inches in diameter—so all your cookies bake evenly.
Once you’ve prepped your baking sheets, gather all ingredients and equipment needed: mixing bowls, spatula, electric mixer or stand mixer fitted with a whisk attachment, and piping bags fitted with round tips for easy decorating.
Step 2: Making the Meringue
In a clean mixing bowl (make sure there’s no grease), whip together three room-temperature egg whites until frothy using an electric mixer on medium speed. Gradually add in granulated sugar while continuing whisking until soft peaks form; then increase speed until stiff peaks form—a good test is if they stand straight when you lift the whisk attachment out.
Once you’ve achieved stiff peaks—a glossy consistency—gently fold in sifted almond flour and powdered sugar mix using a spatula until no dry streaks remain; be careful not to over-mix as it can lead to flat cookies!
Step 3: Piping Out Shells
Transfer the batter into piping bags fitted with round tips (about ½ inch). Pipe small rounds onto prepared baking sheets following traced circles as guides; leave space between each one since they’ll spread slightly during baking.
After piping all shell rounds out onto sheets gently tap each sheet against counter; this helps release trapped air bubbles allowing them more perfectly round shapes after baking!
Let piped rounds sit at room temperature for about 30 minutes before placing them in preheated oven; this drying time forms a skin on top ensuring those lovely feet develop during baking!
Step 4: Baking Your Macarons
Carefully place one sheet at a time into preheated oven; bake each batch individually on center rack without opening door frequently (this can cause cracking).
Bake for approximately 15-20 minutes depending on size—macarons should feel firm when touched lightly on top without sticky residue left behind—if they’re still soft return them briefly back into oven checking every few minutes until done!
Remove from oven once baked let cool completely on sheets before attempting removal otherwise they might break apart!
Step 5: Assembling Your Santa Clauses
Once cooled down completely flip half of cooled shells bottom-side up (the flat side) then use frosting filling generously spread onto middle before placing remaining tops down gently pressing down just enough so filling peeks out around edges!
Don’t forget decorating! Use additional frosting colored red/white piping bags create hats & beard designs giving each macaron its own unique character resembling little Santas!
Serving and Storing Tips
Serving Suggestions
These festive Santa Claus Macarons make an excellent centerpiece at holiday gatherings or parties! Arrange them on decorative plates alongside other treats like gingerbread cookies or peppermint bark—they’ll draw attention instantly!
When serving guests consider pairing these delightful cookies alongside hot cocoa or mulled wine; their sweetness complements warm beverages perfectly enhancing overall experience while indulging everyone’s sweet tooth!
If hosting kids’ parties consider letting children decorate their own Santas making activity fun & interactive adding excitement leading up towards special moments shared amongst loved ones during celebration times together too!
Storing Your Macarons
To maintain freshness store assembled macarons in an airtight container lined between layers of parchment paper separating different flavored varieties if applicable inside refrigerator up-to five days maximum—a longer duration may affect texture quality due moisture absorption within filling content over time affecting overall taste enjoyment factor greatly reducing satisfaction level found after consuming them later-on too!
Alternatively freeze unfilled shells placed neatly inside freezer-friendly containers separated by layers wax paper preventing sticking occurring whilst keeping intact freshness preserved without compromising quality intact even longer periods ahead ensuring ultimate enjoyment whenever desired whenever craving strikes unexpectedly arises again later-on too!
Enjoy creating memories filled with love laughter happiness sharing these deliciously festive treats—their charm brings smiles around holiday tables everywhere!
Mistakes to avoid
When making Santa Claus Macarons, avoiding common mistakes can make a significant difference in the final product. One prevalent error is not weighing ingredients accurately. Macarons require precise measurements for success. A kitchen scale is your best friend; it ensures that the almond flour and powdered sugar are measured correctly for the perfect texture.
Another mistake is overmixing the batter. Once you combine the dry and wet ingredients, mix gently until you achieve a flowing consistency known as “ribbon stage.” Overmixing can lead to flat macarons that do not rise properly. This is crucial because macaron shells need to form a “foot” during baking.
Baking temperature is another critical aspect to watch out for. Ensure your oven is calibrated correctly, as an incorrect temperature can cause your macarons to crack or spread too much. Using an oven thermometer helps maintain the right heat level.
Moreover, neglecting to age egg whites can ruin your macarons. Aging helps improve stability when whipping them into meringue. Ideally, let egg whites sit in the fridge for 24 hours before using them in your recipe.
Lastly, avoid skipping the resting period before baking. Allowing your piped macarons to rest until they form a skin helps them hold their shape during baking. Without this step, you’ll likely end up with uneven shells.
Tips and tricks
To create perfect Santa Claus Macarons, keep these tips in mind. First, invest in quality ingredients. High-quality almond flour and food coloring can significantly affect the taste and appearance of your macarons. Choosing natural food coloring will give you vibrant colors while maintaining flavor integrity.
Second, practice piping techniques for even shells. Use a piping bag fitted with a round tip for even distribution of batter onto your baking sheet lined with parchment paper or silicone mats. Take your time to ensure uniformity in size; this ensures even baking.
Additionally, consider flavor variations for your filling. Classic fillings like buttercream or ganache work well, but don’t hesitate to experiment with flavors like peppermint or chocolate hazelnut to enhance your Santa Claus Macarons’ festive appeal.
Use a template under your parchment paper to help maintain consistent sizes while piping each shell. This technique will guide you on where to place your batter for uniformity.
Finally, be patient! Mastery of macaron-making takes time and practice. If you experience setbacks initially, learn from them rather than get discouraged. Each batch teaches you something new about consistency and flavor balance.
Suggestions for Santa Claus Macarons
When crafting Santa Claus Macarons, presentation matters as much as taste. Consider using edible glitter or sprinkles on top of the macarons after they cool completely; this adds a festive touch that catches the eye during holiday gatherings.
Pairing flavors can also elevate these treats beyond their classic form. For example, incorporating gingerbread spice into either the shells or filling complements seasonal flavors beautifully while enhancing their festive nature.
In terms of storage, ensure that you keep your macarons in an airtight container at room temperature if consumed within a few days; however, if you’re saving them longer than that, freeze them carefully layered between parchment paper in an airtight freezer bag.
Don’t forget about dietary preferences! Offering alternatives such as gluten-free versions using certified gluten-free almond flour allows more people to enjoy these delightful cookies during celebrations.
Lastly, think about gifting options! Present Santa Claus Macarons in decorative boxes or tins tied with ribbons for charming edible gifts during the holiday season that friends and family will appreciate deeply.
FAQs
What is the best way to store Santa Claus Macarons?
Storing Santa Claus Macarons properly ensures they maintain their flavor and texture over time. The ideal method involves placing your macarons in an airtight container at room temperature if you plan on consuming them within three days. However, if you want to save them longer—up to several weeks—freezing is recommended. When freezing, layer each macaron carefully between sheets of parchment paper inside an airtight freezer bag or container to prevent sticking together. Thaw them gradually at room temperature before serving; this preserves both their texture and taste perfectly!
Can I use different colors for my Santa Claus Macarons?
Absolutely! While traditional colors like red and white suit the theme well, feel free to experiment with various shades when creating Santa Claus Macarons! Natural food colorings are available that provide vibrant hues without compromising flavor quality. Consider using green for Christmas trees or light blue for winter-themed variations while ensuring all colors harmonize with chosen fillings such as vanilla buttercream or chocolate ganache.
Why did my macaron shells crack?
Cracked macaron shells often indicate issues with either mixing techniques or baking conditions rather than ingredient faults alone! To minimize cracking risk during preparation: First ensure proper meringue whipping techniques so it achieves stiff peaks without over-mixing afterward; second check oven calibration since high temperatures can lead directly towards cracks forming on surfaces due excessive heat exposure throughout cookie’s baking process itself!
How long should I let my piped macarons rest?
Allowing piped macarons to rest before baking plays an essential role in achieving smooth surfaces and preventing cracks from forming while cooking! Typically resting times range from 30 minutes up until one hour depending upon humidity levels present around where they’re being prepared—higher humidity may require longer rests compared drier conditions which may allow shorter periods suffice instead ultimately leading towards better results!
Can I make these macarons ahead of time?
Yes! Preparing Santa Claus Macarons ahead of time is possible and practical too! You can bake the shells up two days prior then fill just before serving ensuring freshness remains intact alongside delightful flavors intact throughout entirety enjoyed later on by guests who indulge themselves post-baking festivities themselves!
What fillings work best with Santa Claus Macarons?
Choosing fillings greatly influences overall outcome regarding taste satisfaction achieved through experience when indulging oneself within deliciousness offered by these cute festive delights! Classic options include vanilla buttercream or chocolate ganache but exploring seasonal flavors adds unique twists fitting holiday spirit beautifully—for instance peppermint ganache creates refreshing contrast against sweet shell while adding aromatic depth distinctly suited celebrating joyful moments shared together during festivities year-round!
Conclusion
Creating Santa Claus Macarons involves attention to detail and practice but results in delightful treats that everyone loves during holiday celebrations. By avoiding common mistakes like improper ingredient measurements or neglecting resting times, you’ll set yourself up for success every time you bake these adorable cookies.
Print
Santa Claus Macarons Recipe
Ingredients
Macaron Shells
- 100 grams Domino® Golden Sugar
- 4 grams egg white powder optional, read notes
- 100 grams egg whites
- 105 grams almond flour
- 105 grams Domino® Powdered Sugar
Royal Icing
- 1 1/2 cups Domino® Powdered Sugar 187 grams
- 1 tbsp meringue powder
- 4 tbsp water
- 2 drops black gel food coloring
- 1 drop yellow gel food coloring
Sugar Cookie Buttercream
-
- 1/2 cup all-purpose flour 63 grams
- 1/2 cup unsalted butter 113 grams
- 1/4 cup Domino® Golden Sugar 50 grams
- 1 1/4 cup Domino® Powdered Sugar 156 grams
- 1 tsp vanilla extract
- 1/8 tsp almond extract
- 1/2 tbsp milk or heavy cream
- 1/4 cup desiccated coconut shredded (50 grams)
Instructions
Macaron Shells
-
-
Before you start, get all of the ingredients ready. Prepare a large piping pastry bag, fitted with a large round tip, I use a 1/4” diameter tip. Set aside. Line two baking sheets with parchment paper or silicone mat. I use a baking mat with the macaron template already in it. Measure out all of the ingredients. Sift the powdered sugar and almond flour together. Set it aside.
-
Start pre-heating the oven. I pre-heat my large oven to 300ºF for 60 to 90 minutes, this helps with temperature fluctuations. Oven temperature will vary a lot depending on your oven, it’s good to experiment with different temperatures to find out what’s the best for you. If you are using a convection oven, lower the temperature to 270ºF and experiment from there, raising or lowering the temperature as needed.
-
Place a bowl over a pan with barely simmering water. Add the granulated sugar and egg white powder to the bowl if using. If you’re not using egg white powder simply skip it, nothing needs to be changed in the recipe.
-
Whisk the sugar and egg white powder so it doesn’t clump up.
-
-
-
Add the egg whites to the bowl and whisk until the sugar is completely melted. It will take a couple of minutes. You can test by touching the mixture between your fingers, and if you feel any sugar granules just keep whisking the mixture over the water bath.
-
Make sure the bottom of the bowl isn’t touching the simmering water because you don’t want the whites to cook.
-
Also, don’t overheat the sugar syrup, you are just looking to melt the sugar, no need to bring it to a certain temperature. Transfer the syrup to the bowl of a stand mixer.
-
Immediately start whipping the meringue on low for about 30 seconds, then increase the speed to medium. Whisk on medium-low speed for another two minutes. Raise to medium-high and finish whipping the meringue until it achieves stiff peaks. It takes me about 13 to 15 minutes to whip the meringue, but you shouldn’t go by time, go by what the meringue is supposed to look like because a lot of things can affect whipping time, such as the quality of the eggs, the weather, how powerful your mixer is, and more.
-
Once the meringue gets glossy and you start seeing streaks formed by the whisk, and the meringue raising in the center of the whisk, it might be time to stop.
-
You don’t want to over whip the meringue at this point because that can cause several issues, mainly hollow macarons.
-
Whisk until stiff peaks have formed. When you pull the whip up, the peak should be stiff and shooting straight up, with possibly a slight bend at the top, but not bending to the side.
-
Also when you swirl the whisk around in the bowl to collect the meringue, you should feel some resistance from the meringue. And when you look on the bottom of the whisk the meringue collected should be forming soft but defined waves.
-
-
-
Pour the sifted powdered sugar and almond flour into the stiff meringue.
-
Add the food coloring at this point, if using. I am using about 1 tbsp of red gel food coloring
-
Start folding gently forming a letter J with a spatula.
-
Once the dry ingredients have incorporated with the meringue, you can start squeezing the air out of the batter by pressing it down along the sides of the bowl as you fold.
-
It’s time to stop folding when the batter is glossy and has a thick and flowing consistency. First, pick up some batter with the spatula and try to draw a figure 8 with the batter that is dripping off the spatula. If you can form several 8 figures without the batter breaking up, that’s one indication that it might be ready.
-
The batter that’s falling back into the bowl should take 10 to 15 seconds to incorporate with the batter that’s already in the bowl.
-
When you hold the spatula with batter on top of the bowl and the batter falls off the spatula slowly but effortlessly the batter is ready. The batter will keep flowing off the spatula non-stop, but not too quickly.
-
Transfer the batter to the piping bag. I also like to seal the top with a bag tie, so the batter doesn’t dry out and it gives you more control while piping because there’s no risk of the batter escaping through the top of the piping bag.
-
Place the piping bag directly 90 degrees over the center of each macaron template. Apply gentle pressure and carefully pipe for about 3 to 5 seconds, and then quickly pull the bag up twisting slightly at the top.
-
-
Once you’ve piped as many circles as you could, bang the trays against the counter or against the palm of your hand a few times each.
-
Use a toothpick to pop any air bubbles in the surface of the shells.
-
Regardless if you are used to baking macarons without resting, these shells must rest because of the large amount of food coloring added to obtain the deep red color. Let them rest for as long as it takes to make them completely dry and not super soft to the touch. They must form a thick skin before you bake them, or they are likely to crack in the oven. When you touch the surface of a macaron and feels dry and somewhat firm to the touch, you can bake.
-
Bake one tray at a time.
-
I bake each tray for about 15 to 20 minutes. Baking time will vary greatly depending on your oven type or the temperature you are using. Depending on the oven, baking time can take as little as 13 minutes, or as long as 30.
-
When baked, the macarons will have a deeper color and formed feet. If you try to move a macaron, it shouldn’t feel jiggly. If the macaron is still jiggly, keep baking. Also try to touch the top of a macaron and it shouldn’t feel soft, if it’s still soft, keep baking.
-
Remove from the oven and bake the other tray.
-
Let the macarons cool down before proceeding with the filling and decorating.
Royal Icing
-
Place the powdered sugar in the bowl of a mixer. Add the meringue powder and start mixing on low. Gradually add the water with the mixer on. Once the ingredients incorporate, raise the speed to medium high and whip for a few minutes, until glossy and fluffy.
-
The icing should have a flowy consistency, it doesn’t necessarily have to be runny, but should be thick like sweetened condensed milk. If it’s too stiff, add more water to the icing, and if the frosting is too runny, add more powdered sugar to it, to make it thicker.
-
This makes a small batch so make sure your whisk can reach the bottom of the bowl to whip the icing properly, or it may not work out.
-
Divide the icing between two bowls. Color one black, and the other yellow. You will need a bit less of the yellow than you will need black, but you will have plenty of both. Place the black icing in a piping bag fitted with a size 3 tip, and place the yellow icing in a piping bag fitted with a size 2 tip. Don’t leave the icing uncovered because it will dry and form a crust. Keep the icing covered at all times.
Decorate the shells
-
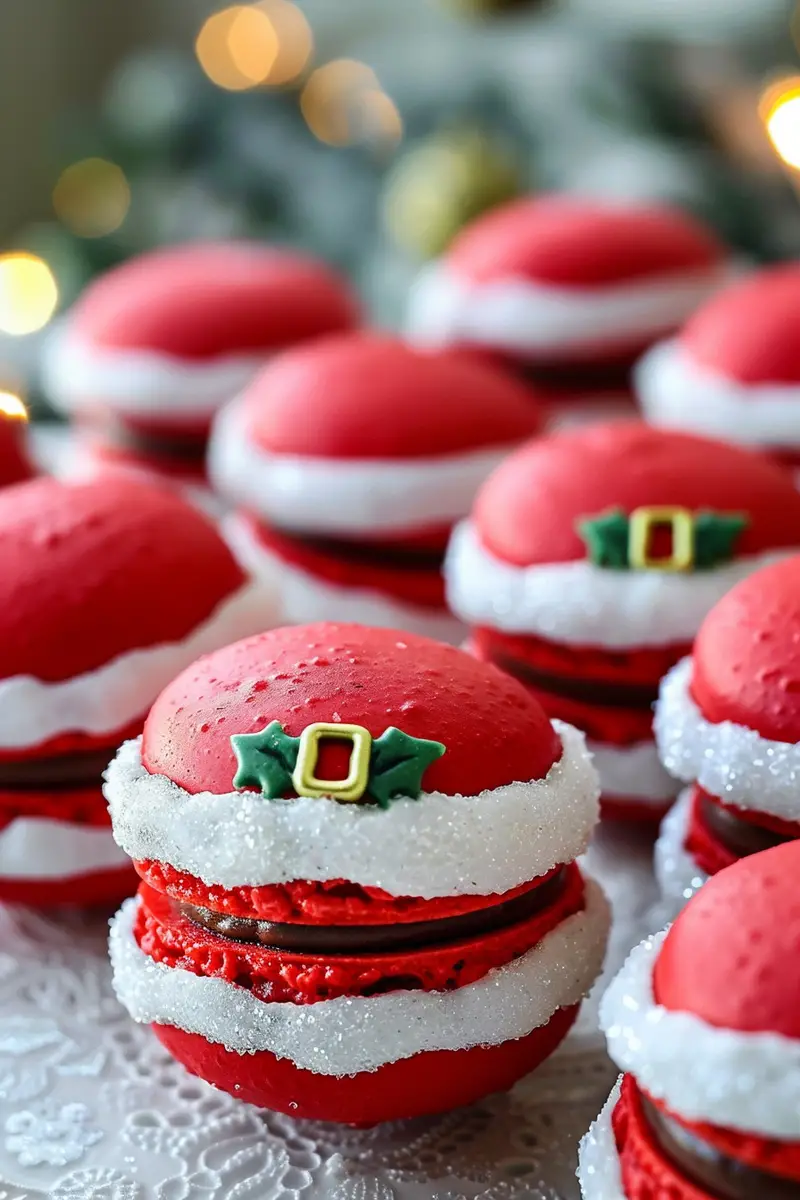
To decorate the shells, pipe a line of black royal icing right in the middle of the shell, to make Santa’s belt.
-
Let the black icing dry for a few minutes, if you place it in the fridge, it dries super fast.
-
Then draw the buckle of Santa’s belt using the yellow icing, and drawing a square in the middle of the belt. You only have to do this on about half of the shells, because the other half will be the bottom shells.
Sugar Cookie Buttercream
-
Start by heat treating the flour. Pre-heat the oven to 350ºF. Spread the flour on top of a parchment or silicone lined baking tray. Bake in the oven for about 5 minutes, stirring the flour in between. Once the flour feels hot, remove from the oven and let it cool down before using in the frosting. This will make the flour safe to eat in the frosting.
-
Place the butter and sugars in the bowl of a mixer. Beat the mixture for about 4-5 minutes, to get it as creamy and smooth as possible. Add the flour, vanilla, almond extract and mix on low to incorporate. If needed add the extra milk or heavy cream. If the frosting is too runny, add more powdered sugar.
Fill the Shells
-
Place the buttercream in a piping bag fitted with a round tip. Pipe the buttercream on a bottom shell, and top with a decorated shell. Roll the sides of the macaron in the shredded coconut.
-
Storage
-
These macarons freeze super well for up to 1-2 months in the freezer. They keep well in the fridge for up to 5 days.