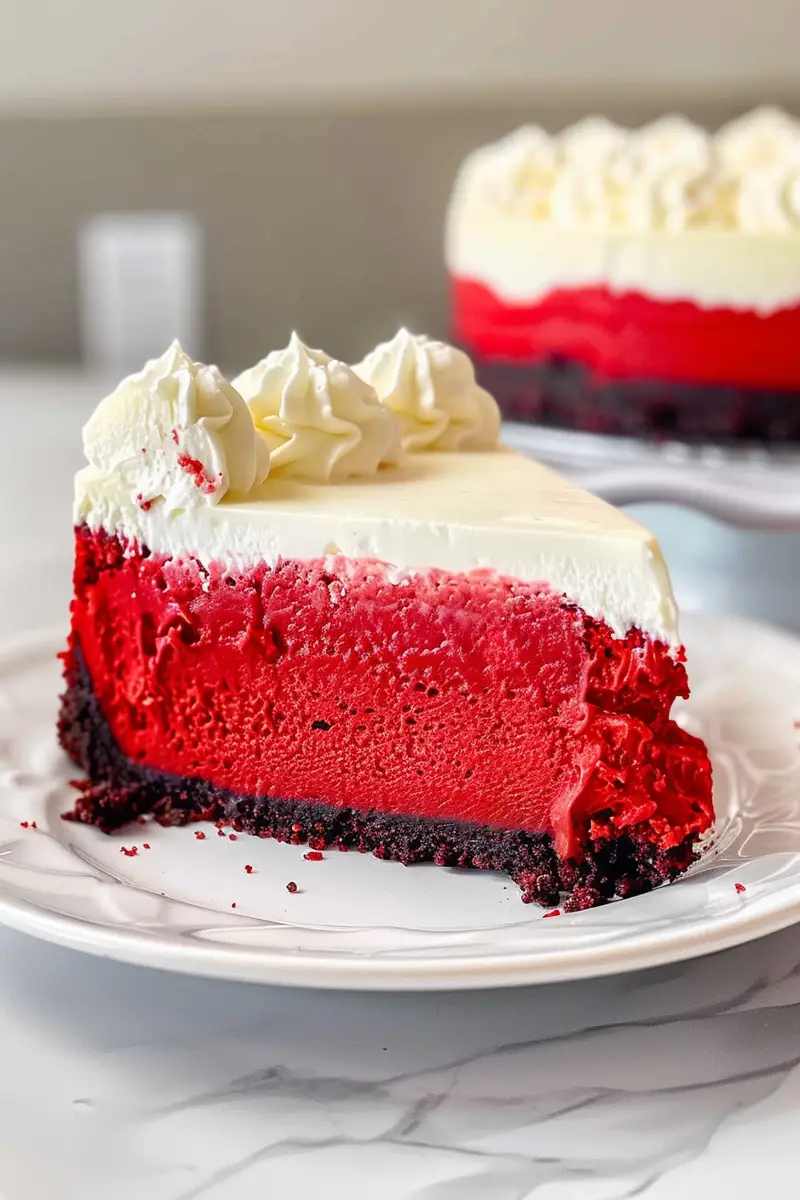
Red Velvet Cheesecake is a dessert that perfectly marries the luxuriousness of cheesecake with the classic charm of red velvet cake. This rich and indulgent treat is not just a feast for the taste buds; it also dazzles the eyes with its vibrant color and creamy texture. If you’re looking to impress guests at a gathering or simply want to indulge yourself, this recipe is ideal. In just a few steps, you can create a stunning centerpiece that will leave everyone asking for seconds.
This Red Velvet Cheesecake is layered with a velvety cream cheese filling and adorned with a rich red velvet cake base. The combination of flavors—from the slight tanginess of cream cheese to the subtle cocoa notes in the red velvet—is nothing short of heavenly. Whether it’s for a birthday celebration, holiday dinner, or just because you deserve something special, this dessert will elevate any occasion.
With an easy-to-follow guide and straightforward ingredients, you can whip up this delightful masterpiece in no time. Gather your supplies and prepare to embark on a delicious journey that culminates in a slice of pure bliss. Let’s dive into what makes this dessert so irresistible!
Main Ingredients
H4: Red Velvet Cake Mix
The foundation of our Red Velvet Cheesecake is the red velvet cake mix, which brings that classic flavor and vibrant hue. Using a high-quality mix ensures consistent results without the need for complex measurements. You’ll need one box (15.25 oz) of red velvet cake mix for this recipe. Make sure to follow package instructions regarding eggs and oil to achieve the best texture.
H4: Cream Cheese
Cream cheese acts as the star ingredient in our cheesecake layer, providing both richness and tanginess. You’ll need 16 oz (two packages) of softened cream cheese to create that smooth filling we all love in cheesecakes. Ensure it’s at room temperature before mixing; this will help achieve a creamy consistency without lumps.
H4: Granulated Sugar
Sugar adds sweetness to our cheesecake while balancing out the tangy cream cheese flavor. You will require 1 cup of granulated sugar for the filling and an additional 1/2 cup for the cake mix preparation. Be sure to use fine sugar so it dissolves easily during mixing.
H4: Eggs
Eggs provide structure and stability to our cheesecake while also adding moisture to the cake layers. For this recipe, you will need three large eggs—two for the cake mix and one for the cheesecake mixture—ensuring your dessert holds its shape beautifully.
H4: Vanilla Extract
Vanilla extract enhances flavors across both layers of our dessert. You’ll need 1 tablespoon of pure vanilla extract; it adds depth and warmth that complements both chocolate undertones in the red velvet mix as well as the creaminess of the cheesecake.
H4: Sour Cream
Sour cream lends moisture and richness while contributing to that signature tang often found in cheesecakes. For this recipe, you will require 1/2 cup of sour cream mixed into your cream cheese layer; it helps create a luscious texture everyone loves.
H4: Cocoa Powder
Cocoa powder introduces subtle chocolate flavoring without overpowering the overall taste profile of your dessert. You’ll only need 2 tablespoons along with your dry ingredients; ensure you use unsweetened cocoa powder for balance.
H4: Whipped Topping
Finally, whipped topping provides an airy finish that’s perfect for decorating your finished cheesecake. A store-bought container (8 oz) is sufficient for garnishing once everything is set—you can even make homemade whipped cream if preferred!
How to Prepare Red Velvet Cheesecake
H4: Step 1 – Preheat Your Oven
Start by preheating your oven to 350°F (175°C). Properly preheating ensures even baking throughout both layers of your cheesecake. While waiting for it to reach temperature, prepare your baking pan by greasing it lightly with butter or cooking spray—this step helps prevent sticking later on.
H4: Step 2 – Prepare Cake Batter
In a large mixing bowl, combine one box of red velvet cake mix along with eggs (as per package instructions), vegetable oil (about 1/2 cup), water (typically around 1 cup), and one tablespoon vanilla extract into smooth batter consistency using an electric mixer on medium speed—make sure there are no lumps! Pour half of this batter into your prepared springform pan evenly spreading it out across bottom surface so it bakes uniformly.
H4: Step 3 – Bake First Layer
Bake the first layer in your preheated oven for approximately 25 minutes or until a toothpick inserted comes out clean from center—do not overbake! Once done baking remove from oven allowing cooling completely before adding next layer—the cooling time usually takes about 20 minutes but may vary depending on kitchen conditions.
H4: Step 4 – Make Cream Cheese Filling
While waiting for cooled cake layer prepare filling by beating together softened cream cheese alongside granulated sugar using electric mixer until combined smoothly without lumps forming—this should take about two minutes! Next add egg followed by sour cream along with remaining tablespoon vanilla extract then blend until everything incorporates well—ensure no streaks remain!
H4: Step 5 – Pour Cream Cheese Mixture
Once fully prepared carefully pour entire mixture over cooled base layer ensuring it’s evenly distributed—using spatula might help spread filling uniformly across surface area while minimizing air bubbles forming underneath which could affect final outcome visually!
H4: Step 6 – Bake Cheesecake Layer
Place back into preheated oven allowing another hour bake time or until edges appear set yet center jiggles slightly when shaken gently—this indicates doneness allowing residual heat finish cooking through without risking dryness developing during long exposure times! Afterward turn off oven leaving door ajar letting cool gradually inside before refrigerating ideally overnight or at least four hours minimum achieving firm consistency necessary serving later on!
Serving and Storing Tips
H4: Serving Suggestions
When ready serve up slices from chilled red velvet cheesecake consider pairing them alongside fresh berries such strawberries blueberries raspberries enhancing presentation while adding extra freshness flavor contrast! Drizzle some chocolate sauce over top achieving beautiful visual appeal too! For gatherings slice carefully using warm knife dipping into hot water between cuts ensures clean edges making each piece look professional grade worthy showcasing efforts culinary prowess celebrated amongst family friends alike!
H4: Storage Guidelines
To store any leftovers wrap tightly using plastic wrap refrigerate up three days maintaining optimal freshness longer than room temperature exposure would compromise quality significantly risking spoilage occurring prematurely due improper handling practices! Alternatively if preparing ahead enjoy freezing portions individually wrapped foil bags lasting several months ideal convenience future indulgence cravings arise unexpectedly!
This Red Velvet Cheesecake recipe promises not only stunning aesthetics but also unforgettable flavors that will leave everyone craving more! Enjoy every bite knowing you’ve created something truly special!
Mistakes to Avoid
One of the most common mistakes when making Red Velvet Cheesecake is not paying attention to ingredient quality. Using subpar ingredients can significantly affect the flavor and texture of your dessert. Always opt for fresh cream cheese, high-quality cocoa powder, and pure vanilla extract. These ingredients contribute to a richer flavor profile and a smoother consistency. If you use generic brands or expired items, your cheesecake may end up tasting bland or have an undesirable texture.
Another mistake is improperly measuring ingredients. Baking is a science that requires precision. Use proper measuring cups for dry and liquid ingredients, and don’t forget to level off your dry ingredients for accuracy. Additionally, room temperature ingredients are crucial for achieving a smooth batter. Cold cream cheese or eggs can lead to lumps in your cheesecake, which can detract from the overall experience.
Overbaking is another pitfall to avoid. Red Velvet Cheesecake should be creamy and slightly jiggly in the center when you take it out of the oven. If overbaked, it can become dry and lose its signature texture. Always keep an eye on the baking time and perform the jiggle test before removing it from the oven.
Lastly, don’t skip chilling time after baking your cheesecake. Allowing it to cool properly sets the flavors and gives a firmer texture. Skipping this step may result in a cheesecake that doesn’t hold its shape when sliced.
Tips and Tricks
To create a perfect Red Velvet Cheesecake, start by preparing your crust correctly. A classic graham cracker crust enhances flavor and provides a sturdy base. Crush the crackers finely and mix them with melted butter until they resemble wet sand before pressing them firmly into your pan. This ensures that your crust holds together well once baked.
Use a water bath while baking your cheesecake for an even cook and to prevent cracks on the surface. Wrap your springform pan with aluminum foil to prevent water from seeping in, then place it in a larger pan filled with hot water before placing it in the oven. This technique creates moist heat around the cheesecake during baking, ensuring an ultra-smooth texture.
Incorporating sour cream into your filling adds richness and tanginess that balances out the sweetness of the cake beautifully. Aim for one cup of sour cream mixed into your batter just before pouring it into the prepared crust; this will elevate your Red Velvet Cheesecake’s flavor.
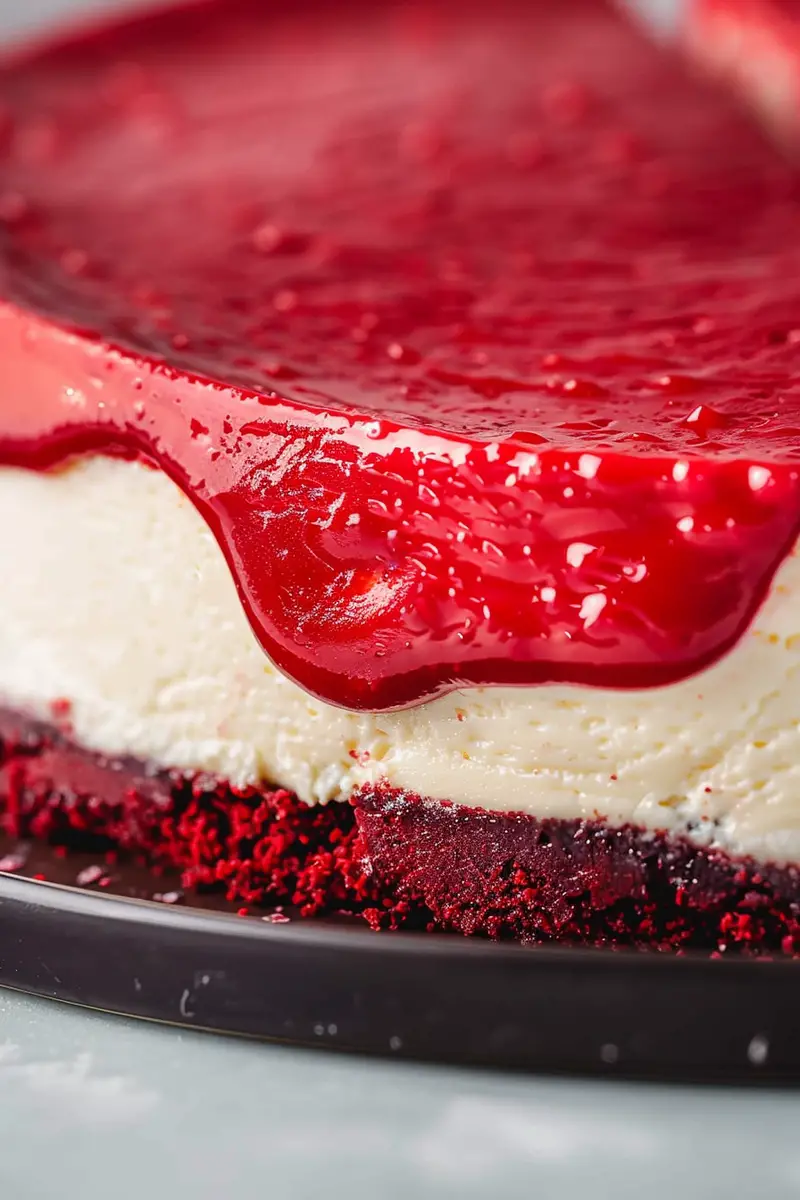
Don’t forget about garnishing! Topping your cheesecake with whipped cream or chocolate shavings adds visual appeal and extra flavor layers that enhance every bite. You might also consider fresh berries for a pop of color and acidity that cuts through richness.
Lastly, when serving, allow the cheesecake to sit at room temperature for about 30 minutes before slicing; this makes cutting easier and allows flavors to bloom fully.
Suggestions for Red Velvet Cheesecake
For those looking to customize their Red Velvet Cheesecake experience, consider experimenting with different flavored extracts beyond vanilla; almond extract can add an unexpected twist that pairs beautifully with red velvet’s unique taste.
When it comes to decoration, think beyond standard toppings! Drizzle some chocolate ganache or raspberry sauce over individual slices for an elegant presentation sure to impress guests at any gathering.
If you’re feeling adventurous, try adding layers of cookie crumbs or fudge between layers of cheesecake batter before baking; this will create delightful surprises in each slice while enhancing textural contrast.
For those who prefer gluten-free options, swap out regular graham crackers with gluten-free alternatives that still provide similar textures without sacrificing flavor.
You might also want to explore variations by infusing seasonal flavors into your recipe; pumpkin spice for fall or peppermint extract during winter holidays can transform this classic dessert into something new yet familiar!
Lastly, don’t hesitate to seek inspiration from other cultures! Infusing elements like matcha powder or chai spices can give an exciting twist while still honoring traditional Red Velvet Cheesecake roots.
FAQs
What is Red Velvet Cheesecake?
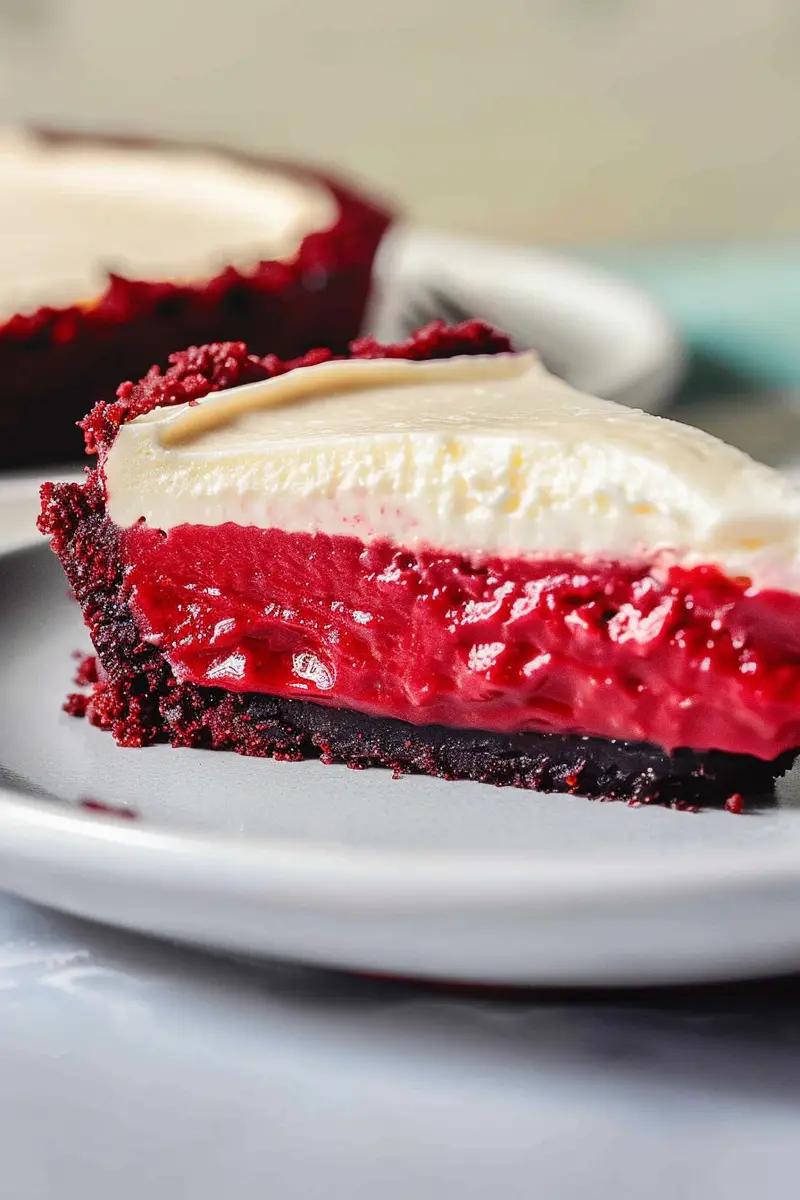
Red Velvet Cheesecake is a delicious dessert combining two beloved treats: red velvet cake and creamy cheesecake. It features layers of rich red velvet cake interspersed with velvety cream cheese filling. The result is a visually striking dessert that balances sweetness with tangy notes from the cream cheese. Often topped with whipped cream or frosting, this dessert is popular at celebrations like birthdays or holidays due to its vibrant appearance and decadent taste.
Can I make Red Velvet Cheesecake ahead of time?
Absolutely! In fact, making Red Velvet Cheesecake ahead of time allows flavors to meld beautifully over time. Prepare it one day prior to serving; simply chill overnight in the refrigerator after baking until completely cooled down—this will yield optimal results! Ensure you cover it tightly with plastic wrap or foil so that no air affects its texture or taste while stored.
How do I store leftover Red Velvet Cheesecake?
To store leftover Red Velvet Cheesecake properly, cut individual slices first if desired then place them in an airtight container in the refrigerator where they’ll stay fresh up to five days—if you’ve got leftovers after all that! Alternatively, you can freeze slices wrapped individually in plastic wrap followed by aluminum foil; this way they’ll last up three months in storage without losing quality!
Can I use food coloring alternatives?
Yes! While traditional recipes call for red food coloring specifically designed for cakes—there are natural alternatives available such as beet juice powder which adds both color & nutrition without synthetic additives! However note that these substitutes may alter original flavor slightly so adjust proportions accordingly when incorporating them into your recipe!
What types of pans work best for baking cheesecakes?
The ideal choice would be springform pans because they allow easy removal once cooled down without disturbing delicate layers inside! A non-stick option works wonders too but ensure you line bottom sides thoroughly beforehand if using regular round pans—this prevents sticking issues upon release once finished baking!
How do I know when my Red Velvet Cheesecake is done baking?
Knowing when it’s done requires careful observation rather than relying solely on timers! Look out specifically for slight jiggle at center still firm edges surrounding it—this indicates perfect balance between baked outer layer while maintaining creamy interior richness expected from cheesecakes!
Conclusion
In summary, creating a delicious Red Velvet Cheesecake requires attention to detail from ingredient selection through proper baking techniques down towards presentation choices made afterward! Avoid common pitfalls such as using low-quality ingredients or neglecting chilling times which undermine efforts spent crafting this delightful dessert masterpiece!
Incorporate practical tips like utilizing water baths during cooking sessions alongside creative suggestions enhancing overall experience through unique variations—these approaches enrich every aspect related serving experience making memorable moments shared among friends family alike!
By following these guidelines combined together along ensuring thoughtful preparation practices employed throughout process—the results yield extraordinary outcomes sure leave lasting impressions upon anyone lucky enough indulge decadent treat created lovingly within kitchen space designed culinary artistry flourish beautifully within its form!
Print
Indulge in a Decadent Red Velvet Cheesecake Recipe
Ingredients
- All-purpose flour: 1 1/2 cups, for the cake base
- Unsweetened cocoa powder: 2 tsp, for a hint of chocolate
- Salt: 1/2 tsp, to enhance the cake’s flavor
- Unsalted butter: 1/2 cup, at room temperature, for moistness
- Granulated sugar: 1 cup, for sweetness
- Sour cream: 1/2 cup, at room temperature, for a moist cake
- Vegetable oil: 1/4 cup, to keep the cake moist
- Pure vanilla extract: 2 tsp, for flavor
- Large eggs: 2, at room temperature, for structure
- Red food coloring: 4 tsp, for the iconic red hue
- Buttermilk: 2/3 cup, at room temperature, for a tender crumb
- Baking soda: 1 tsp, for leavening
- White vinegar: 1 tsp, to activate the baking soda
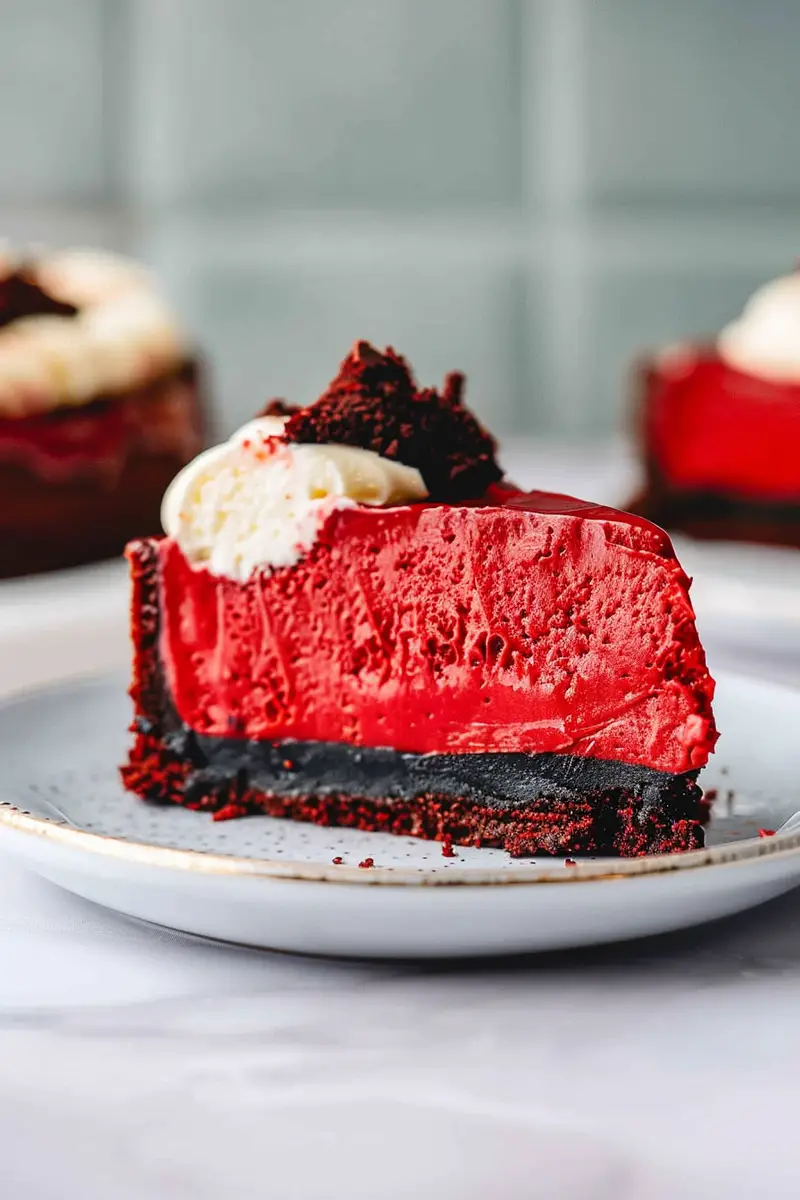
- Oreos (filling removed, wafers crushed): 10, for the crust
- Full-fat cream cheese: 24 oz, at room temperature, for the cheesecake filling
- Oreo filling: from the above 10 Oreos, to enhance flavor
- Granulated sugar: 1 cup, to sweeten the cheesecake
- Cornstarch (or all-purpose flour): 1 tbsp, for thickening the filling
- Sour cream: 1 cup, at room temperature, for creamy texture
- Pure vanilla extract: 1 tbsp, for flavor
- Large eggs + 1 egg yolk: at room temperature, for structure
- Oreos (chopped): 15, for added crunch in the cheesecake
- Dark chocolate chips: 1 cup, for the ganache
- Heavy cream: 1/2 cup, for a smooth ganache
- Store-bought cream cheese frosting: 1 can, for decorating
- Chopped Oreos: 8, for garnish
Instructions
Step 1:Preheat the oven to 350°F. Line a 9-inch springform pan and an 8-inch round cake pan with parchment paper; spray with non-stick spray.
Step 2:Whisk together flour, cocoa, and salt. Cream butter and sugar until fluffy, then mix in sour cream, oil, vanilla, eggs, and red food coloring. Gradually add dry ingredients and buttermilk, followed by baking soda and vinegar. Divide the batter between the pans and bake for 18-20 minutes. Cool completely.
Step 3:Blend Oreo wafers into fine crumbs. Beat cream cheese with Oreo filling, sugar, and cornstarch until smooth. Add sour cream, vanilla, eggs, and egg yolk, mixing well. Fold in Oreo crumbs and chopped Oreos. Pour over the cooled cake base in the springform pan.Step 4:Bake in a water bath at 300°F for about 1 hour and 30 minutes. Cool gradually in the oven, then refrigerate overnight.
Step 5:Microwave chocolate chips and heavy cream, stirring until smooth. Pour over the chilled cheesecake.
Step 6:Crumble the reserved red velvet cake and press onto the sides of the cheesecake. Decorate with cream cheese frosting and chopped Oreos.