Soft cut out sugar cookies are a delightful treat that brings joy to any occasion. Whether you’re baking for a holiday celebration or just want a sweet snack, these cookies are sure to impress. Their tender texture and buttery flavor create a perfect canvas for colorful icing and sprinkles. In this article, we will guide you through creating these delicious cookies step by step, ensuring you can achieve the perfect results every time.
These cookies are not only fun to make but also allow for creativity in decoration. You can customize them with different shapes and colors, making them ideal for birthdays, holidays, or just an afternoon treat. The dough is easy to handle, allowing you to roll it out and cut it into various shapes with ease. Once baked, they hold their shape well, making them perfect for intricate designs.
In addition to being tasty, soft cut out sugar cookies are versatile. You can infuse them with various flavors or add different types of frosting depending on your preference. This recipe ensures that you’ll have a batch of cookies that are soft and chewy on the inside while slightly crisp on the outside. Get ready to impress friends and family with these delightful treats!
Main Ingredients
All-Purpose Flour
All-purpose flour is the backbone of our soft cut out sugar cookies. It provides structure and stability to the dough while allowing the cookies to rise beautifully during baking. For this recipe, you will need 3 cups of all-purpose flour. Be sure to measure accurately; too much flour can lead to dry cookies.
Granulated Sugar
Granulated sugar adds sweetness and contributes to the overall texture of the cookie. For this recipe, use 1 ½ cups of granulated sugar. This amount ensures the cookies have just the right sweetness without being overpowering.
Unsalted Butter
Unsalted butter is vital for achieving a rich flavor in your soft cut out sugar cookies. You’ll need 1 cup (or 2 sticks) of softened unsalted butter. The butter should be at room temperature so that it blends smoothly with the other ingredients.
Eggs
Eggs act as a binding agent in this recipe and help create a tender texture. Use 1 large egg along with 1 egg yolk for added richness. This combination gives your cookies a lovely softness while maintaining their shape during baking.
Vanilla Extract
Vanilla extract enhances the flavor profile of your sugar cookies. For this recipe, use 1 teaspoon of pure vanilla extract. This simple addition elevates the taste and aroma of your cookies significantly.
Baking Powder
Baking powder is essential for leavening your soft cut out sugar cookies, helping them rise and become light and airy. You will need 1 teaspoon of baking powder in this recipe.
Salt
A pinch of salt balances the sweetness in your dough and enhances all flavors present in your cookies. Add about ½ teaspoon of salt to ensure your treats taste fantastic.

How to Prepare Soft Cut Out Sugar Cookies
Step One: Gather Your Ingredients
Start by gathering all your ingredients on a clean countertop or workspace. Ensure you have everything measured accurately before beginning the mixing process; this organization makes it easier as you follow each step sequentially.
Step Two: Cream Butter and Sugar
In a large mixing bowl, combine the softened unsalted butter and granulated sugar using an electric mixer on medium speed until light and fluffy—about 2-3 minutes. Scrape down the sides of the bowl as needed to ensure even mixing. The mixture should be pale yellow when done; this process incorporates air into the batter for lighter cookies.
Step Three: Incorporate Eggs and Vanilla
Once your butter-sugar mixture looks creamy, add in one large egg and one egg yolk along with 1 teaspoon of vanilla extract. Beat everything together until well combined; this might take another minute or two at medium speed until fully blended into a smooth consistency.
Step Four: Combine Dry Ingredients
In another bowl, whisk together your all-purpose flour, baking powder, and salt until evenly combined—this step helps distribute every ingredient properly throughout your dough once mixed later on.
Step Five: Mix Wet & Dry Ingredients
Gradually add dry ingredients into the butter mixture using low speed on your mixer; mix until just combined—do not overmix! Your dough may look slightly crumbly at first but should come together nicely once formed into a ball by hand afterward if necessary.
Step Six: Chill Dough
Wrap your mixed dough tightly in plastic wrap or place it in an airtight container before chilling it in the refrigerator for at least one hour (or overnight). Chilling helps firm up the dough so it’s easier to handle when rolling out later while also enhancing its flavors as they meld over time.
Step Seven: Preheat Oven & Prepare Baking Sheets
While waiting for dough to chill properly preheat your oven at 350°F (175°C). Line two baking sheets with parchment paper or silicone mats ensuring they’re prepared beforehand so that once cutting shapes begins everything flows seamlessly!
Step Eight: Roll Out Dough
After chilling is complete remove from fridge; lightly dust your work surface with flour then take half of chilled cookie dough—keeping remaining half cold—and roll it out evenly about ¼ inch thick using rolling pin until smooth without sticking too much!
Step Nine: Cut Shapes
Use cookie cutters of choice (preferably festive ones) dipped lightly in flour if needed before pressing firmly into rolled-out dough making sure not twisting cutter when lifting off! Transfer shaped pieces carefully onto prepared baking sheets leaving some space between each piece since they will spread slightly during baking!
Step Ten: Bake Cookies
Place sheets into preheated oven allowing them bake approximately 8-10 minutes based on size until edges turn golden brown but centers remain soft! Keep an eye on them towards end because every oven varies! Remove pans from oven once completed letting cool completely before transferring onto wire racks!

Serving and Storing Tips
Serving Suggestions
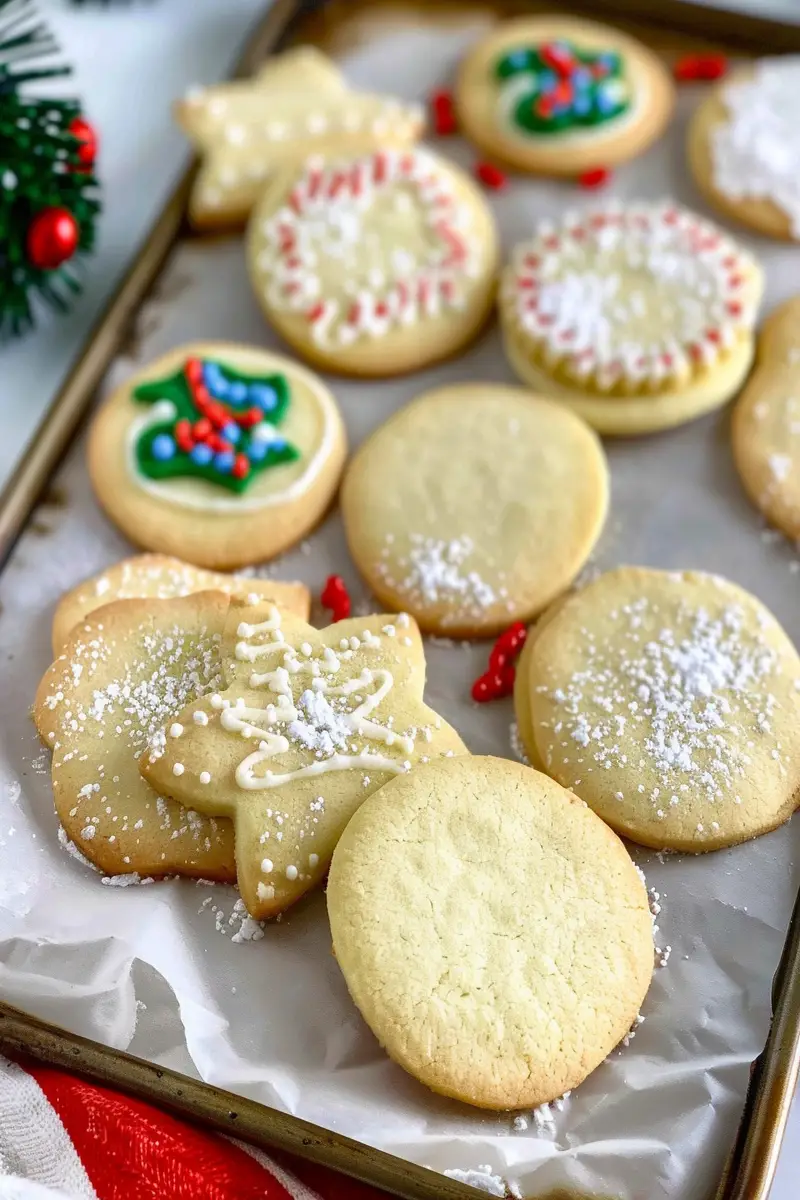
Serve these delightful soft cut out sugar cookies fresh from the oven or allow them to cool completely before decorating with icing or sprinkles! They pair wonderfully with milk or tea—perfect for afternoon snacks or dessert after dinner gatherings! You can plate them creatively using vibrant colors based on seasonality which adds visual appeal especially during holidays like Christmas where red-green themes prevail prominently!
Storage Instructions
Store cooled decorated/un-decorated leftover soft cut-out sugar cookies in an airtight container at room temperature away from direct sunlight exposure keeping moisture levels minimal—this method preserves their freshness effectively! If stored properly they last about one week providing plenty opportunity indulge whenever craving strikes!
For longer storage options consider freezing unbaked shapes directly on parchment-lined trays until firm then transfer into freezer-safe bags containing layers separated by parchment paper preventing sticking while retaining original shape intact during freezing process lasting several months ahead ready whenever unexpected guests arrive needing last-minute treats!
By following these detailed steps from preparation through serving/storage tips anyone can successfully whip up batches upon batches without hassle enjoying delicious homemade delights anytime desired!
Mistakes to avoid
One common mistake when making soft cut out sugar cookies is not chilling the dough. Chilling allows the butter to solidify, which helps the cookies maintain their shape during baking. If you skip this step, your cookies may spread too much and lose their cute shapes. For best results, chill the dough for at least an hour before rolling it out and cutting your shapes.
Another frequent error is using the wrong type of flour. All-purpose flour works best for soft cut out sugar cookies, as it provides the right balance of structure and tenderness. If you substitute cake flour or bread flour, your cookies may turn out too soft or tough. Always measure your flour correctly, spooning it into a measuring cup and leveling it off rather than scooping directly from the bag.
Overbaking is another pitfall to avoid. Soft cut out sugar cookies should be taken out of the oven when they are just lightly golden around the edges. They will continue to cook on the baking sheet after being removed from the oven. Keep an eye on them towards the end of baking time to ensure they don’t become hard or crunchy.
Finally, neglecting to use parchment paper can lead to sticky situations. Parchment paper provides a non-stick surface that helps cookies bake evenly and release easily without breaking apart. If you skip this step, you risk having half your cookies stuck to the pan, ruining your beautiful designs.
Tips and tricks
To achieve perfectly soft cut out sugar cookies, start by using room temperature ingredients. Ensure that your butter is softened but not melted; this allows for better incorporation of air during mixing, resulting in a lighter texture. Room temperature eggs also mix more smoothly into your dough, which contributes to uniformity in consistency.
When rolling out your dough, dust your work surface with flour sparingly. Too much flour can make your cookies dry and tough. Instead of adding excess flour on top of your dough, consider rolling between two pieces of parchment paper; this keeps everything neat while preventing sticking without compromising moisture levels.
Using high-quality vanilla extract can elevate the flavor profile of your soft cut out sugar cookies significantly. Pure vanilla extract offers a rich taste that enhances sweetness without being overpowering. Avoid imitation vanilla as it can provide a less desirable flavor that detracts from your cookie experience.
Incorporating zest from citrus fruits like lemon or orange can add a delightful twist to traditional flavors. Just a teaspoon of zest can brighten up your cookie without overwhelming it with tartness, giving a refreshing aroma that pairs beautifully with frosting or icing.
Suggestions for Soft Cut Out Sugar Cookies
Consider experimenting with different types of frosting when decorating soft cut out sugar cookies. Royal icing provides a smooth finish that hardens well and is great for detailed designs. Alternatively, buttercream icing offers a creamy texture ideal for spreading and piping decorations on top while adding richness to each bite.
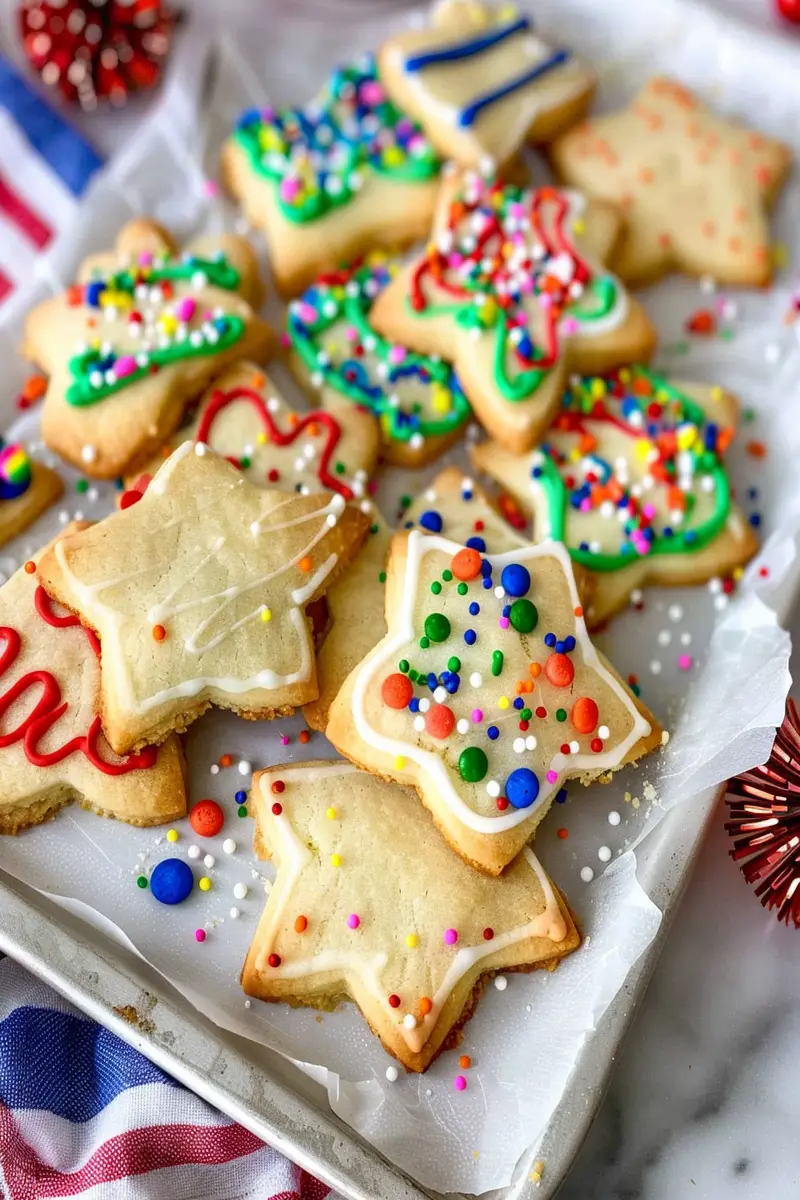
Using food coloring in frosting or dough can bring vibrancy to festive occasions like holidays or birthdays. Gel food colors are preferable because they provide intense color without altering the consistency significantly—just remember to start with a small amount as you can always add more if needed!
Pairing these cookies with complementary flavors is another fun suggestion—enjoy them alongside flavored teas or coffees that enhance their sweetness without overshadowing it. For instance, pairing lemon-sugar cookies with chamomile tea creates a soothing afternoon treat perfect for gatherings.
Lastly, consider storing your decorated soft cut out sugar cookies in an airtight container layered with parchment paper between each layer to preserve their softness. If you need them to last longer than a week, freezing them is an option; simply wrap them tightly in plastic wrap before placing them in freezer bags.

FAQs
What are soft cut out sugar cookies?
Soft cut out sugar cookies are sweet baked treats made from a simple blend of ingredients like butter, sugar, eggs, and flour. These cookies are known for their tender texture and ability to hold various shapes when rolled out and cut with cookie cutters. They differ from traditional crispy sugar cookies due to their moist interior and softer bite.
How do I store soft cut out sugar cookies?
To store soft cut out sugar cookies properly, place them in an airtight container at room temperature for up to one week. For longer storage options beyond a week, freeze them by wrapping each cookie individually in plastic wrap before placing them inside freezer-safe bags or containers—this helps maintain freshness and prevents freezer burn.
Can I freeze uncooked soft cut out cookie dough?
Yes! Freezing uncooked cookie dough is possible for later use without losing quality or flavor integrity over time. After preparing the dough according to recipe instructions but before chilling it thoroughly shape into discs or logs wrapped tightly in plastic wrap then place inside freezer bags—this method allows easy slicing once ready for baking!
What’s the best way to decorate soft cut out sugar cookies?
The best way involves using royal icing or buttercream frosting based on preference! Royal icing provides intricate details while hardening nicely after application; buttercream offers creamy richness when spread generously across cookie surfaces—consider both options depending on desired look along with occasion needs!
Why did my soft cut out sugar cookies spread too much?
Excessive spreading often occurs due to factors such as warm dough temperatures prior baking times combined with insufficient chilling periods beforehand! Always ensure proper chilling (at least one hour) allows fats within dough solidify properly ensuring minimal spreading once placed into hot ovens!
Can I make these vegan-friendly?
Absolutely—you can create vegan versions by substituting non-dairy butter alternatives along with flaxseed eggs instead traditional egg usage! Adjustments should be made regarding ingredient ratios slightly compared typical recipes while still achieving delicious results enjoyed by everyone!
Conclusion
In conclusion, mastering soft cut out sugar cookies requires attention to detail throughout every stage of preparation—from mixing ingredients properly down through precise baking times—all play crucial roles ensuring success! Avoid common mistakes like skipping essential steps such as chilling dough while exploring creative tips including unique flavor enhancements through zests/icing variations provided above will elevate overall experience enjoyed by all! Remember storing methods impact longevity so take care packaging favorites carefully preserving freshness until savored again next time around! Enjoy crafting delightful memories around celebrating moments shared over these tasty treasures baked at home today!
Print
Soft Cut Out Sugar Cookies
Ingredients
- – Dry Ingredients:
- – ¾ cup all-purpose flour
- – 1 teaspoon baking powder
- – ½ teaspoon salt
- – Wet Ingredients:
- – ¾ cup salted butter, softened to room temperature
- – 1 cup granulated sugar
- – 2 large eggs, at room temperature
- – 1 teaspoon vanilla extract
- – ½ teaspoon almond extract (or ¼ teaspoon for a milder flavor)
- Optional Icing.
- – 3 cups powdered sugar, sifted
- – 3-4 tablespoons milk
- – 2 tablespoons light corn syrup
- – ½ teaspoon vanilla extract
- – Gel food coloring, optional
Instructions
1. Prepare the Dry Ingredients:
– In a large bowl, whisk together the flour, baking powder, and salt. Set aside.
2. Cream the Wet Ingredients:
– In a separate large bowl, use an electric mixer to cream the softened butter and sugar until light and fluffy.
– Add the eggs one at a time, mixing well after each addition.
– Mix in the vanilla extract and almond extract until fully combined.
3. Combine the Mixtures:
– Gradually add the dry ingredients to the wet ingredients, mixing on low speed until a soft dough forms.
4. Roll and Chill the Dough:
– Divide the dough into two equal portions.
– Place each portion on a lightly floured piece of parchment paper or silicone mat. Roll out to about ¼-inch thickness using a floured rolling pin.
– Lightly dust the top of the dough with flour, cover with plastic wrap, and refrigerate for at least 1–2 hours or overnight.
5. Cut the Cookies:
– Preheat the oven to 375°F (190°C). Line 2–3 large baking sheets with parchment paper or silicone mats.
– Remove one dough portion from the refrigerator. Use cookie cutters to cut into desired shapes. Arrange the shapes 2–3 inches apart on the prepared baking sheets.
6. Chill and Bake:
– Re-roll any scraps to cut out more cookies, chilling the cut-out shapes on the baking sheet in the fridge or freezer for at least 10 minutes before baking.
– Bake the cookies for 8–10 minutes, or until lightly browned.
– Allow cookies to cool on the baking sheet for 5 minutes, then transfer to a wire rack to cool completely before decorating.
7. Optional Icing Preparation:
– In a medium bowl, combine the powdered sugar, 2 tablespoons of milk, corn syrup, and vanilla extract. Stir until smooth.
– Adjust consistency by adding more milk (for thinner icing) or powdered sugar (for thicker icing) as needed.
– Add gel food coloring if desired and mix until evenly tinted.
– Pipe or spread the icing onto cooled cookies. Allow the icing to firm up for several hours before packaging.